This is the single largest MP in the course, with both core and elective points. The core parts are core for two reasons.
In the short term, we’re about to learn WebGL2. WebGL2 is simpler than some other 3D APIs, but it is still quite complicated, needing to coordinate between multiple processors, memory pools, and languages. This assignment has you implement (and thus learn and internalize) a portion of that API a piece at a time in a language you’re familiar with without the complexity of the Browser-CPU-GPU communication component of WebGL2.
In the long term, I want to show you there’s no magic in graphics by revealing how each piece of current graphics systems work. You remember what you do for far longer than you remember what you’ve merely been told, so implementing is key to that. An essential piece of graphics is how triangles are rendered and interpolated across, so that’s core. The various electives are all also common and useful, though less essential.
Electives
You may stop after implementing the core parts. Elective parts may be implemented in any set of MPs, and getting 0 electives here is fine if you do extra electives elsewhere.
The first four elective components complete the core functionality; they are prerequisite to the other electives in this MP.
The other electives are mostly independent of one another, with the first four electives as their only prereqs. However, there are a few exceptions where additional prereqs are needed:
It is tedious to grade output files for inputs you haven’t implemented. When you upload, you will be asked to select which electives (if any) you’ve implemented and we should grade.
What you submit
For this MP you submit one program, in any language of your choosing, that implements all the core and any elective functionality you choose. The program will be executed as follows:
make build
make run file=rast-grey.txt
make run file=rast-smallgap.txt
# ...
make run file=rast-points2.txt
See the associated warm-up for more on how to set up a Makefile and generate PNG images.
Test Files
All test input files, reference output files, and supporting files can be downloaded as a zip
Core
| rast-gray.txt |
 |
Comments inside input file give intermediate computation results. |
| rast-smallgap.txt |
 |
Checks especially for boundary via the gap between triangles and the initial offsets via the lack of horizontal bands in the color of the left triangle. |
| rast-smoothcolor.txt |
 |
Various interpolation errors can be detected because in this image they’ll create a color difference on the front triangle. |
| rast-checkers.txt |
 |
More than a hundred adjacent 1-pixel-wide triangles to test alignment. Note especially the white row on the top.
Some pixels DDA generates will be off-screen. You can simply ignore (not draw) those pixels.
You may wish to try this with a higher-res output (up the png size severalfold on the first line) to see how triangles make this image. |
Elective but regularly used by WebGL2 programmers
| rast-depth.txt |
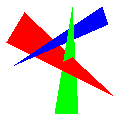 |
Created by a combination of (a) depth interpolation to each pixel and (b) comparison with a per-pixel depth value; if you plot the depth of each pixel as a gray-scale color you should get something like this:
 |
| rast-elements.txt |
 |
|
Electives that are always enabled in WebGL2
| rast-sRGB.txt |
 |
rast-smoothcolor with sRGB; note that adding sRGB makes it much brighter overall. |
| rast-gammabox.txt |
 |
rast-checkers with sRGB; if your monitor is properly calibrated, squinting should make this look uniformly gray. |
| rast-perspective.txt |
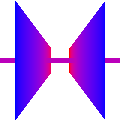 |
The left wall is split in the middle, the right wall is not, as shown in this image with a different color for each triangle:
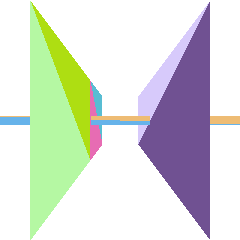
Despite the geometry difference, both should have the same overall color, and both should match the color of the horizontal bar where it crosses them. |
| rast-frustum.txt |
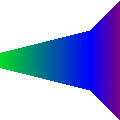 |
Includes both zero and negative w values; if you don’t clip it probably won’t run at all. |
| rast-manyclip.txt |
 |
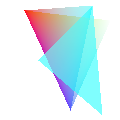
Two intersecting triangles extending both behind and in front of camera clipped by several frustum walls.
This file has many pixels on the borders of the clips that are susceptible to rounding errors. If you have an edge or vertex off by one pixel from our reference, that just means you made those roundings differently than us; no points will be lost. If you have an edge that ought to be straight appear curved instead, that is a logic error and will result in points lost. |
Electives that WebGL implements as shaders
| rast-textures.txt |
 |
Note that straight lines in the textures look straight because the file uses hyp; without that it would have had changes in angle where the two triangles of each face met, like this:

There are multiple places in texture code where rounding can be done in several ways; rather than enumerate them all, we accept images where the textures are shifted up to one full texel from our reference images. |
| rast-matrix.txt |
 |
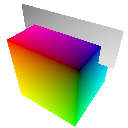
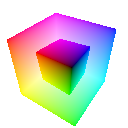
This is an RGB/CMY cube rendered twice using matrices we’ll learn to construct later in the course. |
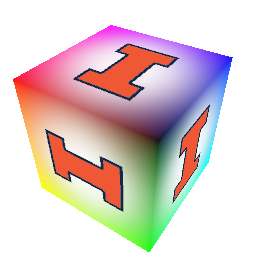
| rast-decals.txt |
 |
|
State
In this assignment you will implement a subset of the GPU operation of WebGL2 and related rendering libraries. The commands in the text files we provide are inspired by the WebGL2 API, and will work best if you mimic in your code the GPU state that WebGL2 expects.
You’ll have four broad kinds of state:
- Mode-switching state, mostly Booleans like
is the depth buffer on?
- Uniform state shared by all geometry being rendered, such as texture maps and matrices
- Per-vertex attributes, stored in array buffers
- Connectivity state, stored in element array buffers
The attribute buffers in WebGL2 are assumed to be variable-length arrays of 4-vectors. WebGL2 lets you specify many such buffers and use them in programmable ways using vertex shaders; in this assignment we have just a few specific attributes:
position, with coordinates (x,y,z,w)color, with coordinates (r,g,b,a)texcoord, with coordinates (s,t)pointsize, with coordinates (p)
WebGL2 lets you specify attributes with different numbers of coordinates than the internal state would suggest. It fills in missing coordinates as (0,0,0,1):
- if just one value x is supplied use (x,0,0,1);
- if two values (x,y) are supplied use (x,y,0,1);
- if three values (x,y,z) are supplied use (x,y,z,1);
- if four values (x,y,z,w) are supplied use (x,y,z,w).
The element array buffer is just a list of integers.
Algorithm
Most lines of the input file will be manipulating state, after which will be a drawing command. The drawing command tells you which indices in the attribute buffers to connect into primitives. You’ll make those connections and then draw each primitive.
GPUs generally use the Bresenham algorithm to draw triangles, modified with optimizations for cache locality like tiles, optimizations for parallelism like stamps, and optimizations of depth buffers like HiZ. Bresenham is very efficient in hardware as it can avoid some of the complexities of floating-point arithmetic, but you’re writing code to run on the CPU with full floating-point support so we recommend using the simpler but functionally equivalent DDA algorithm instead. We also don’t recommend adding any of the hardware-oriented optimizations.
DDA works on vectors. You should definitely code it with vectors, probably with long vectors including all the attribute values at a point together in one (i.e. (x,y,z,w,r,g,b,a,s,t) if you implement all the elective parts). The only non-vector operations are:
- Viewport transformation does different things for x and y
- DDA should step in y along edges, in x along scanlines
- Divide-by-w is mostly vector, but the new w is 1/w not w/w
- Divide-by-1/w is mostly vector, but only applies to non-position parts (i.e., color and texcoord)
That’s it. Every other part of DDA uses vectors, and if you find yourself writing something[2] or something.z anywhere in your DDA code you did something wrong.
The result of DDA is interpolated values at each pixel. Here you’ll access individual coordinates: x and y to be the pixel coordinate, z for the depth buffer, s and t for texture lookups, a for alpha blending, and (r,g,b) for color.


